The Final Fantasy Project: Final Fantasy I, part 4
Artwork from a sketch by Yoshitaka Amano
As I’ve mentioned several times now, Final Fantasy is not a lengthy game if you know what you’re doing. It’s not even all that lengthy if you don’t, honestly. All of the stuff I’ve written about in the last three entries took me about ten hours to complete, and if you’ve been playing the game as long as I have it’s likely you can do the same. Square had pretty much acknowledged the brevity of the game by releasing it almost exclusively as a package deal with Final Fantasy II for years, but when it came time to recreate the game again for the Game Boy Advance someone had a brainstorm.
That brainstorm is the Soul of Chaos. Four dungeons, each thematically linked to one of the four Fiends and sporting bosses from a later game. The Anniversary release also adds in new music for these bosses, remixed versions of their battle themes from the respective games. So if you want to accept the newest version of the game as canon, it means that these bosses appearing later is a reference back to the first game, even though they’re appearing in the first game as references to the later games.
Like I said, it’s sort of weird. But sort of awesome, too.
There’s never much of a story given for these dungeons, outside of a lone NPC next to each one who mumbles something and then ignores you. What is in each dungeon is treasure. You go inside purely for pragmatic greed, as these dungeons house a lot of best-in-slot equipment that wasn’t available in the original game. Want to pick up a fourth Ribbon for your party? That’s in here. Ultima Weapon? Yep. Elven Cloaks? Permanent stat boosts? You bet. High-powered automatic weaponry? Not yet.
Not everything is particularly powerful, unfortunately. Every time I got a Protect Drink or, worse yet, a handful of gil I felt like I’d gotten ripped off. It’s still a good exercise, though, hiding all of the screamingly valuable bits that break the game in two behind a wall of content that’s tuned more for characters wielding that power. Similarly, a single trip through one dungeon won’t have you beating Chaos in two hits. So it’s balanced, even if the net effect is that you walk out much more powerful.
Since you’re able to run these dungeons multiple times, the game also provides some incentive by randomizing them. Each dungeon has a certain number of floors (5 in Earthgift Shrine, 10 in Hellfire Chasm, 20 in Lifespring Grotto, and 40 in Whisperwind Cove) and a corresponding number of maps. The order in which you see those maps, excepting boss floors, is completely random. This is very relevant, as different maps have different numbers of chests and the treasures found on each floor number are fixed. So you might always get a Golden Apple in the fifth chest on the seventh floor… but if the seventh floor map only has three chests, you’re out of luck.
It sounds a bit complicated, but it really only becomes that way when you’re trying to chase a particular doodad. Me, I was just trying to clear most of these, because they’re a chance for all sorts of weird references, minigames, and general strangeness to infect the game.
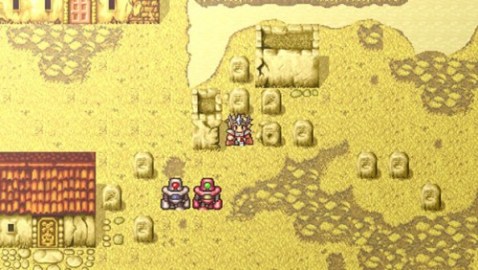
Robots.
Earthgift Shrine: I had run this one before, obviously, but I hadn’t discussed it in more than passing. The shortest of the dungeons at five floors with a choice of bosses at the end, Earthgift was far wimpier than I had expected. There are a few gems here and there, but after beating all the fiends pretty much the entire dungeon is filled with enemies you can sleepwalk through and there aren’t many treasures. All bosses are from Final Fantasy III, and all are subject to pretty standard boss strategies.
Hellfire Chasm: This is the first dungeon where the team gets a little experimental – there’s a map in here that consists of an alternative overworld which forces you to find a ship, then find the airship to reach the exit. It is kind of neat in concept and kind of awful in practice. There are also lots of damage floors, a floor with constant damage without a damage floor, and a sort of sliding puzzle game with NPCs. Bosses are from Final Fantasy IV and include the only two-stage boss in the game along with some pretty brutal fights. This is where the game starts introducing you to the idea that the dungeons will be fairly easy while the boss fights will be utterly brutal.
Lifespring Grotto: Bosses are from Final Fantasy V, and the dungeon caps off with a choice of fighting Shinryu and Omega. If you’ve ever played a game where either of those bosses are available, you know that they’re going to be brutal, so I opted out of this one.
Whisperwind Cove: The longest dungeon with the most treasures, including the best possible sword for a Red Mage and the best possible sword in the game (Ultima Weapon!) down at the bottom. That means a long darn slog, and this one mixes up its maps pretty extensively as a result. You’ve got a nod to Final Fantasy VI‘s Floating Continent, a version of Mysidia, a hide-and-seek game, searching for robot parts… all mixed in with several normal maps.
My favorite map in here was one that seems almost out of place. You’re placed in an area with several floating flames, and an NPC informs you that these are souls of individuals you’ve dispatched. You have to clear them… which you do by talking to them. There are only two that result in fights (talking to Astos and the Vampire from earlier in the game) and all of them offer you a glimpse into the mind of these creatures, something the rest of the game isn’t set up to offer. It’s oddly serene.
The bosses are from Final Fantasy VI, and they will hurt you. Several of them have a couple of nearly maximized stats, and one of them alternates between a physical attack that will kill most characters in one hit or a quick shot of 300ish damage to all party members. Here’s where you need to take advantage of stacking buffs and really slowly whittle down your targets, compared to the almost automatic random battles. Easy Levels, Hard Bosses indeed.
Unfortunately, it’s not until the bottom ten floors that the dungeon really starts giving enemies that are worth fighting to level up. Experience rewards are insanely variable in the Soul of Chaos dungeons, possibly because the game expected players to be doing any serious grinding elsewhere. Either way, I walked out with several bits of armor and weaponry, several stat boosts, and three of the four dungeons cleared to the bottom.
So how do these additions stack up to the rest of the game? They’re obviously a patch job, perhaps a bit too transparently so, but they’re also the only real way you can expand this game without fundamentally changing it. (We’ll talk about that in a couple of games.) If you love the game and want more, they do offer that. They also offer an excuse to just keep repeatedly grinding away, so perhaps they’re not all good, and I fear for the sanity of someone desperately trying to get a specific tenth chest in Whisperwind. I can see myself going back to the game after beating it just to mine them out a little more, though, which is probably the big litmus test for whether or not they work.
For now, though, I’ve seen enough. That means it’s time to go finish off the game at the same point that it started.
 Recent Work
- An error has occurred; the feed is probably down. Try again later.
Chocobo Dash
- An error has occurred; the feed is probably down. Try again later.
