The Final Fantasy Project: Final Fantasy III, part 4
Artwork from a sketch by Yoshitaka Amano
Let me tell you something, ladies and gentlemen: I’m in some real trouble here. I kind of expected that by this point in the project I’d be halfway-ish through the game, like I was with Final Fantasy II, but darn if there isn’t a lot of good stuff going on here and if we’re not even at the second of four crystals. This is not going to be a shorter jaunt, it seems. I’d be much more upset about this if Final Fantasy III weren’t a joy to play.
Albeit one with some reservations. I mean, we’re up to the Tower of Owen now, and this dungeon pulls in a lot of stuff that really could have remained by the wayside. Sure, it was cute when you had me turn my entire party into miniature versions of ourselves for about a year, but now you’re asking me to turn the group into a bunch of toads. Toads! Go home, designers, you’re drunk. At least it’s not something you need to keep up for the whole dungeon.
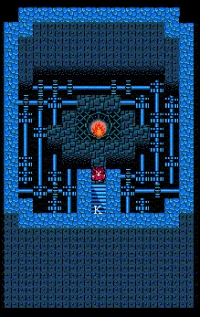
While the remake uses a consistent color scheme throughout the tower, the original version makes the top much darker than the remainder of the tower. Honestly, I find it a lot more effective in the long run.
The tower itself is a series of very small floors with a minimum of alternate routes; more often, the trick is how winding the passages can be. What struck me as interesting was the fact that the whole experience is similar to Final Fantasy I‘s dungeons in spirit, if not in layout – you have a very finite amount of resources, and the key challenge is using as little of them as possible until absolutely necessary. Fights are not horribly dangerous, but they are numerous, and you can get overwhelmed and run out of tricks long before the dungeon runs out of monsters. Sure, you can wipe away wounds with a simple Cure, but are you going to have enough Cures to fix everything?
I certainly didn’t have enough Echo Herbs to fix everything, so I opted to leave my Red Mage silenced until we were nearly at the boss. Once we reached Medusa, she dropped some plot foreshadowing regarding the name of who we’re fighting, then attacked. This fight sucked, not because it was terribly difficult but because Medusa sports a big old pile of HP and my attacks could only chip away at that pile, a far cry from the many boss fights that only took a round or two of concentrated swording to conclude. We emerged victorious, but by the end we were nearly out of healing spells and most of the group was silenced (though thankfully not the White Mage).
After the fight, Desch remembers who he is and what he needs to do, which is apparently “conveniently die.” There’s a bit more to it than that, but that’s the long and short of it. We’re now firmly in the territory of having a party member or two die in every game, ladies and gentlemen. The scene isn’t exactly as devastating as it might be, but it’s handled with as much pathos as the game can muster, and it does come as something of a tonal shift. For all the hijinks that your team gets up to, this is seriously for higher stakes than just kids farting around.
With the pathos gone, it’s time to go back to farting around! Or at least taking a quick side trip to Gysahl, the source of the eponymous greens that have been associated with horsebirds forever now. I like to imagine that this one town is somehow handling a robust interdimensional trade route, distributing what amounts to grass across all sorts of worlds. It amuses me.
Gysahl itself doesn’t have much of note, aside from some treasures, a Magic Key shop, and an old man that lets you peek at your bestiary. This is mostly relevant if you’re playing a non-DS version of the remake, since 25% of the bestiary is when you can pick up the Onion Knight class if you really want it. So it’s a fairly quick jaunt back to what we were supposed to be doing originally, which was heading off to the Dwarven island.
Remember, we needed to find the next crystal? I know, we’ve spent a lot of time faffing about doing everything else, but that’s part of the fun here.
Dwarfton features the usual chance to stock up and a request that you go retrieve a MacGuffin down a hole, which requires you to turn into a toad again. Boy, I’m glad this has become a regular thing now, I am. The net result is that it’s another quick trip through a mini-dungeon, featuring the usual complement of enemies who can kill you or petrify you or whatever. Not for nothing, the fact that this game featured stuff designed to overcome these conditions from the word go makes it all feel a lot more survivable than the same problems in the first game, but it’s still irritating to know that sometimes your efforts will be brought to a screeching halt as you try to avoid someone ending the battle dead or stoned.

It’s bomb, it’s bomb, it’s big exploding and red! It’s bomb, it’s bomb, kill it in one turn or you’re dead!
The boss is about as hearty as Medusa with less stone and more Mini. He falls into the increasingly unusual class of enemies who are weird and seem important but are mostly just weird one-offs, which is a tradition I’m sad to see go over the years. His Mini antics get really irritating if you’re unlucky, though, and even more so when you consider that Mini both inflicts and cures the status. I saw him clear the status from party members only to have another member inflict it again by trying to help, which was some kind of fun, believe me.
Mercifully, killing bosses here nets you a full recharge afterward, so the group saddled up and ran back to the dwarves without too much trouble. Well, aside from the crazy high rate of Back Attacks, but that could be dealt with, even if sometimes it meant liberal abuse of the “Flee” ability. Once back in Dwarfton, I watch as Gutsco reappears, steals both of the horns of ice, and then skeedaddles off to the cave of the Fire Crystal, which conveniently is where I was heading anyhow.
The Molten Cave brings the volcanic cave of Final Fantasy to mind, as it resurrects the fun of wading in lava but with a less irritating overall layout. A great deal can be accomplished here simply by having two mages using Ice Staves; yes, the items-that-cast-spells are still a thing in this installment, and you will have found that many staves by this point in the game anyway, thus making the whole experience much easier. Enemies still inflict statuses upon hit occasionally, but they’re not nearly as bad as stone, which gives the whole thing a much easier feel.
Well, aside from the fact that you will constantly be chugging potions. Seriously, this is non-stop. Drink more potions, all the time, every time. There’s no way your Cure spells can keep up with walking in lava.

Ah, the halcyon days of Final Fantasy. Back then, we didn’t ask why there was a man using a snake as a loincloth who also had wings and shark teeth. It was just kind of part of the world. We accepted that yes, he was there, and he was an antagonist, and we needed to fight him. Why? Why anything?
Once you reach the crystal area, Gutsco helpfully shows up bragging about how he has the power of flames. He attacks you in the form of a downright goofy-looking dragon, which sort of undercuts the seriousness of the scene. This thing is a bug-eyed mess, it’s not intimidating. It does hit hard, though, enough so that it’s helpful to bust out a couple of big attack items early on. From there, it’s mostly just a matter of pounding on him with Ice Staves, keeping up a steady stream of healing, and hoping something doesn’t go unexpectedly wrong, like him spamming Fire Breath multiple times in a row.
Spoiler warning: that can totally happen. And did my first time on the boss.
This is actually a problem introduced in the remake rather than the original. In an effort to make the game more “balanced,” every boss gets two attacks, as I’ve mentioned before. But there’s nothing keeping a boss from just hitting you with two attacks in a row that were designed to be handled one at a time. You can call it challenge, but it really isn’t; it’s just the game rolling the dice and coming up with “fuck you” as a result. So you have to more or less just grind up some more levels and try again, hoping that this time you can kill the boss before the fucking commences.
On the bright side, the game also lets you mix up tactics if you want to. In this case, I decided that having a Thief in the party wasn’t cutting it, swapped in a Black Mage, picked up a spare Blizzara spell and went back to grind for a little bit. The second time around, things went much more smoothly, and down goes Dippy the Dorky Dragon.
Yes, I know he was named Salamander. Let me enjoy myself a little here.
At long last, the group has reached another crystal, and that means opening up a new selection of jobs – Knight, Ranger, Scholar, and Geomancer. How do they stack up? Geomancer is always of dubious utility, but Scholar is much more powerful in the remake than in the original, sporting access to magic levels 1-3 along with a free ability that serves as both Libra and Dispel. Ranger does a good job of handling the surprisingly powerful bows at this stage of the game, and Knight will serve as an excellent tank until Viking shows up. So the team is put into new jobs, everyone’s kitted out, and it’s time to swing back to Dwarfopolis for a pat on the back over a job well done. We even got back to doing the job we originally set out to do! Eventually.
 Recent Work
- An error has occurred; the feed is probably down. Try again later.
Chocobo Dash
- An error has occurred; the feed is probably down. Try again later.
