The Final Fantasy Project: Final Fantasy III, part 8
Artwork from a sketch by Yoshitaka Amano
You’d think that this series would involve more submarines. Exploring the underwater world seems like a natural extension, yet only here and in Final Fantasy VII do you get to slip beneath the waves reliably. Otherwise, the water is an effective barrier to everything you want to do. Ah, well.
You’d also think that having access to a submarine wouldn’t really open up more exploration options, since you can sort of fly right now. Au contraire, dear readers. Unlike most games in the series, airships in Final Fantasy III can’t pass through the majority of mountain ranges, which means that you can’t simply soar everywhere. There are places that are completely inaccessible unless you have a ship that can fly past some low-lying foothills… or a ship that can go under those same mountain ranges. Hmm. I wonder what sort of ship might be able to do that? Oh, right, a submersible airship able to explore strange new lands. Away we go!
The first thing that’s interesting to note about the undersea region in the game is that it’s astonishingly good for leveling. Unlike dungeons or even the field, if at any point you’re low on resources you have an instant out by just surfacing, and the enemies don’t hit terribly hard. It’s a great way to fly up in levels in a relatively short period of time with minimal risk, although not no risk. It is another spot where lightning-based abilities reign supreme, which is somewhat in contrast to, well, most of the game.
A bit of exploration nets you access to a town with loads of spells all the way up to Level 7, which matters a lot more if you’re doing a magic-heavy playthrough, which I am not. What can I say, I love physical damage. The spells are still well worth buying for magical characters, but it’s unlikely to break the bank unless you’re loaded with a Red Mage, Black Mage, and White Mage at once. You can also access two optional side dungeons, the Saronian Catacombs and the Sunken Cave. The former is a bit easier than the latter, especially if you take the time to electrocute a bunch of underwater fish first.
You don’t think… nah. Couldn’t be.
Note that I said “easier,” not “easy.” The monsters in the Catacombs hit hard and generally have enough health that they can last through a beating, so it’s quite easy to see a party member or two drop if you get unlucky here and there. (This happened and caused an ugly gap for one of my characters; I didn’t feel like re-doing my first foray just to even that out.) Even if you technically outlevel the enemies in here, it’s still advisable to take a sort of scouting approach, moving in, taking the treasures you can, then getting back out. There’s also a segment full of trapped chests that really demonstrate the true power of the Viking: equipping two shields and Provoking bosses whilst taking minimal damage. Provoke’s miss chance is more than a little annoying, but if you’ve been leveling Viking fairly consistently it’s in the realm of managed loss.
Reaching the end brings you face-to-face with Odin, who’s a tough customer as always. Useful for summoning, of course, but tough, and possibly best put off until after the Sunken Cave. It’s his Zanketsun that really hurts, being a big attack that will hit everyone in the party for massive damage, far more than anything else in the dungeon dishes out.
You can also wait until you get to the end of the game and just buy yourself a copy of Odin like some sort of demented Pokemon, but that’s the easy way out.
Oh, right, the Sunken Cave. Well, it’s a cave and it’s underwater, hence the name. There are treasures here, the game tells you nothing about why they’re here, but you probably guessed that. It’s also even more of an experience extravaganza, happily throwing levels at you as if they were made of candy that the enemies did not want. So even once you’ve cleaned out the treasures, it’s worth returning to. There’s also a group of bosses in secret chests, one of whom fulfills the role of the obligatory zombie boss who dies to a single casting of Raise. The others aren’t too tough, just hard-hitting and with more HP than you’d expect.
Once you’ve finished taking care of side matters, or when you feel like advancing the plot, it’s time to go to Time. The Temple of Time, I mean. For no adequately explained reason, the enemies here hit harder and take more punishment than those in the Sunken Cave whilst giving out less experience, so great work on the balance there. This is also where you start seeing behemoths wandering around, and if that’s not a fun experience I don’t know what is. Nothing like snapping into a sudden and unexpected boss fight to keep the blood moving. There are also some brutal dragons about, but they don’t have the same kind of series reputation as the behemoth. After a thorough pilfering, the team uncovers Noah’s Lute, which we have to bring to wake up Doga’s contemporary Unei.
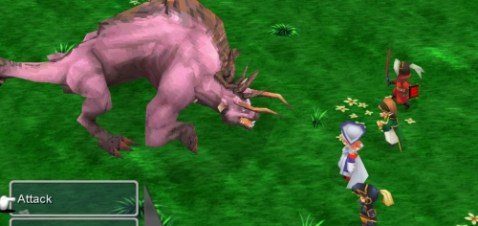
Those big purple hippos are really the signature beast. Like dragons in Dungeons & Dragons or goths with boundary issues in Vampire: the Masquerade.
Unei seems happy enough to wake up and quickly agrees to take the party to the Invincible, handing over the Fang of Fire in the process. We’re finally told what the Fangs are supposed to be, essentially magical keys to get through a barrier in front of Xande’s fortress. (It would matter more if we’d had reason to ask at any point, since various people just threw the fangs at us along the way, but whatever.) Now it’s off to the Ancient Ruins, and to our great surprise the Nautilus is still intact! It doesn’t even explode when we reach the Ancient Ruins, to my great surprise.
The Ancient Ruins houses the start of another regular and irritating mechanic, enemies that divide up when physically hit and not killed. It also features the best mage armor in the game, oddly enough, just being sold in a group of mid-dungeon shops. Well, whatever, bought is bought. It’s a good place for Dark Knight to Shine, between Souleater and a high physical attack that’ll help clear things away in one hit. You finish up with treasures failry early, leaving you just running along a very long hallway to reach your objective, nothing to break up the pattern but the occasional spot of combat.
When people complain about the modern games just being a run down a hallway, I laugh.

For the record, this is what Titan looks like.
Once we’re done taking the long trip through the ruins, though, it all proves worthwhile as you unlock the Invincible, which is just ridiculous. The ship is so big it can’t even properly land. It has a free inn, a group of shops, cannons that fire at any airborne enemies that the group might encounter, a fat chocobo, and the ability to hop over mountains. There’s also a moogle here to check your bestiary and another to give you your mail, so that’s awesome. Time to get the Fang of Earth, since that’s our hot ticket to getting the last set of jobs.
As I’ve mentioned before, the ever-expanding scope of this game is part of what I love about it, and this last airship really sort of sells it. You’ve gone through a lot of ships, and now you’re riding around in something so far beyond other games that it becomes almost absurd.
Your first stop is Falgabard, which is the town of Dark Knights and features their signature weapons in abundance. Dark Blades are functionally katanas, but here they’re primarily used to prevent enemies from splitting up, and also to make the Dark Knight even more attractive. A couple of caves here hold some light boss fights and a variety of nice treasures, reason enough to dally for a bit before heading back to the Invincible. Our real objective is on another continent altogether. We have to fly through some airborne monsters to get there, but as mentioned, the Invincible opens off fights with a cannon volley that helps tear things up nice and quick.
This is also what Titan looks like. Come on, guys, you could have legit reused this one!
The Cave of Shadows is not a pleasant place in the remake, kind of being suffused with death and bones. It’s also a place where non-Dark Knights really can’t get away with physical attacks at all, so they’re better relegated to other duties. Casters can still use magic, and I put my Viking on Provoke duty with two shields and standing in the back row. Ironically, because of their weakness, most of the enemies that require a Dark Blade hit will die in one attack to a dual-wielding Dark Knight anyway. This dungeon also loves fake walls, to the point where half of the dungeon is completely hidden from sight and is out in the black. The name is not inaccurate, there’s plenty of shadow, all right.
At the very end of the dungeon, we run into Hecatoncheir, who completely fails to live up to his name by only having two very visible hands. He also failed to be much more than a punching bag, seeing as his basic attacks did 0 damage to my Viking with two shields and Protect. Provoke hit more often than not, and it became a matter of just beating on him repeatedly until he died without ceremony. The team nabs the Fang of Earth to complete the elemental set, and it also means that you can sequence break just a little bit to pick up something quite desirable: the last set of jobs!
There’s a set of statues not far from the Cave of Shadows. Before, getting through them was impossible, because you didn’t have all four fangs. Now that you do, the statues vanish as you walk past, allowing you to fly deeper into the mountains. This leads you to the Ancients’ Maze, which isn’t something you want to take on in its entirety right now, but it does contain the last crystal. Approaching it summons Titan, who oddly looks both exactly like Hecatoncheir with a slight color swap and looks nothing like the version of Titan we’ll be summoning to beat him down with. I know, I don’t know. He’s honestly barely any harder than the other boss, despite supposedly coming after a few more side dungeons and being much higher level.
So now it’s time to get moving toward the conclusion. Once we’ve finished putting on new jobs, anyway.
 Recent Work
- Wisdom of Nym: Speculating on Final Fantasy XIV Evercold’s weekly activity system
- World of Warships celebrates Independence Day with a spectacularly dreadful MURICA battleship
- The Daily Grind: How do you pick your mounts in MMOs?
- Tomo Endless Blue funded on Kickstarter for almost $250,000 with a Switch 2 version on the way
- WRUP: What I think the positions in soccer mean because I didn’t listen edition
- Betawatch: EverQuest Legends’ preorders, ArcheAge’s reboot
- Warframe of Mind: Shining some light on Jade Shadows Constellations
- Arc Games MODA Fellowship’s Rise of the Heskyr season gets a full-on trailer
- Mortal Online II opens up the Sarducaa region on the test realm
- Pantheon brings back Essence for Dire Lords and includes new branches for Shaman players on the PTR
Chocobo Dash
- An error has occurred; the feed is probably down. Try again later.
