The Final Fantasy Project: Final Fantasy III, part 10
Artwork from a sketch by Yoshitaka Amano
It’s kind of a shame that this game hasn’t made as big of a deal about Xande as the root of all evil. Sure, he’s the guy behind a whole lot of crap that we’ve dealt with up to this point, but we haven’t seen him or even heard from him directly. Yes, I know, up until we reached the surface world he was kind of frozen in a flooded landscape, but still. It would have been nice to put a face to the name before now, you know? There’s no sense of an emotional grudge match.
Of course, Final Fantasy II tried doing that, and that had its own problems.
At any rate, the last “dungeon” in Final Fantasy III is pretty ornate, composed of four separate dungeons, albeit with one of them as an optional sidequest. Once you’ve broken through the guardian statues with the four Fangs, you’ve got the chance to see the start, but you need those keys from Unei and Doga to really get into the meat of the dungeon. So off we go, back to the spot where we unlocked the final set of jobs, ready to crush the face of whoever stands between us and our goal.
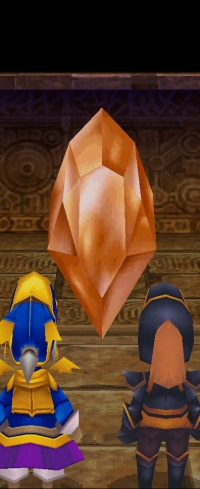
Yep, it’s still here. Hey, remember when that guy with a gold fetish made us think that he’d blown this crystal up? Anyone know what happened to him, that was just weird.
Incidentally, it’s really fun to be flying in the Invincible and just blow my most powerful attacks on any little annoyance, because I can always duck below decks for a refresh.
Despite the name, the Ancients’ Maze isn’t much of a labyrinth at all. It’s actually pretty straightforward, even simple. There are plenty of enemies and plenty of treasures, but there aren’t any bosses and most of the enemies mostly just received my appreciation for showing up in Final Fantasy XIV‘s first installment of the Crystal Tower. I’ve also kept calling the damn thing the Labyrinth of the Ancients after Final Fantasy XIV, which is patently incorrect, but what are you going to do? Once you finish getting through it, you can save, but as the game doesn’t have any form of tents or whatever all you can do is hope you haven’t worn your reserves down too far.
Inside the tower, moving due north leads to the forbidden land Eureka, home of the last best shops and several more bits of treasure. It’s also a real test of endurance, since you’ll be put up against several bosses before you’ve reached the end. They’re not the hardest bosses, but it’s still a boss rush. However, it’s the only way to get the level 8 spells for anything other than Summoners, which makes it worth the effort.
The first boss is a Ninja guarding a Ribbon, that legendary defense against status ailments. He’s not much of a boss, but then, your magic isn’t refreshed after killing him, so that sort of balances out. A bit further down the road, you find the Moonring Blade, which is guarded by Amon, who is apparently Hein’s long-lost brother. Unlike Hein, you’ve got a lot of non-elemental damage options now, so there’s no need to scan for his weakness when you can just bust out Bahamut and Leviathan along with physical attacks. Sending him to the land of wind and ghosts does refresh your magic, nicely enough.
Shortly thereafter, the team is pitted against Kunoichi for the Masamune, who can attack three times in a row and humorously didn’t have a single Provoke miss. In other words, her big accomplishment was repeatedly smacking my Viking for 1 damage three times in a row. Thanks!
Another boss fight with a guy called General netted me the Excalibur, whilst the Guardian got me Ragnarok. That fight was particularly cute, as the boss opens off by casting Reflect on himself… which is not much of a ward against summons or physical attacks. Right after that, however, any cockiness I might have been feeling evaporated when I fought Scylla, who likes to cast Holy and absolutely nuke the face off of your party. It wasn’t an easy fight, is what I’m saying. Blood was spilled.
Mercifully, that’s the end of the optional bonus dungeon – all that’s left is the last floor, which is just selling the best of the best spells. There’s also a store selling Shuriken, the immensely powerful throwing weapon that Ninjas can use to destroy things at will. A more straightforward description: it’s the point when you sell off every piece of armor you’re not using to buy more of these weapons. I wound up with 15.
From here you can either port out or walk; I opted to port. Then it’s time to start exploring the tower proper, which absolutely loves miniboss fights. They’re not proper bosses, but they’ve got HP well into the five-digit ranges and they get the obligatory two attacks per round. Some of this, I believe, is a function of the remake, but my memories of this particular region are fuzzy at best, so don’t quote me on that. Unei’s key unlocks the upper portion of the tower, and the team can start climbing all the way up, fighting off some rather nasty but survivable enemies along the path. The real danger here is just the sheer amount of resource drain going on. You’re going to have to dip deep into your stock of potions and healing spells to make progress, and there are no rest stops along the way.

This is going to get worse before it gets better, isn’t it?
The bright point to all of this is that there are some rather weak enemy spawns that summon more enemies, leading to long battles in which you are facing no real danger and can earn massive stacks of experience almost by accident.
By the time you reach the top of the tower you’re darn near exhausted, but at least you know you’ve made it. Then the party looks into a mirror and becomes paralyzed, which starts a series of scenes in which the various people that have been encountered over the course of the game wind up coming along to help break the curse, and… you know, it’s a montage sequence, it’s not going to make a lot of sense. Just go with it. Oh, also apparently Desch wasn’t dead, or something?
Right. Just going with it. Never mind.
Breaking through the mirror, you find Xande drawing darkness in, as is his method of operation. For the big bad, he doesn’t do much of note – he hits hard, but not hard enough to even drop anyone. Bahamut is summoned, heals are cast, swords are inserted into his abdomen. Some concentrated firepower downs him in just a few rounds. That can’t be all there is, can it?
No, no it’s not. Xande has summoned the Cloud of Darkness, the first in a long tradition of random eleventh-hour enemies to fight. The Cloud promises to return the world to darkness, then promptly assaults the as-yet-unhealed party with her ambiguous nudity. It’s time to settle in for another boss fight after exhausting a lot of prior resources, but it’s all for nothing – no attacks do anything, and her main attack hits the entire party for maximum damage. So much for that plan.
But of course that’s not the end – this is a scripted fight to lose if ever there was one. So the Light Warriors are revived by the hopes of the people they met along the way. So the team jumps into the World of Darkness, their last hope to balance the light and dark before the destruction of the world.
Yeah, it’s gotten really melodramatic at this point.
 Recent Work
- An error has occurred; the feed is probably down. Try again later.
Chocobo Dash
- An error has occurred; the feed is probably down. Try again later.
