The Final Fantasy Project: Final Fantasy IV, part 6

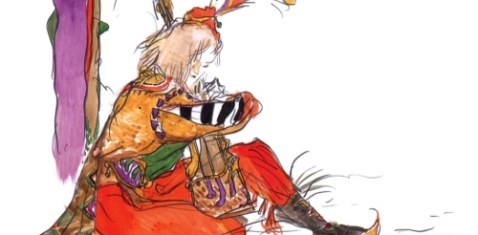
Artwork from a sketch by Yoshitaka Amano
While we’ve already had to ditch all of our metallic equipment (i.e. most of the good equipment we’ve got) just to approach the stupid dungeon, there’s one more hoop to jump through – reaching it. That means a trip way to the north to pick up a chocobo capable of crossing rivers, something that’s only vaguely hinted at by the game. It’s easy to miss the very existence of these chocobo forests, so that doesn’t help matter. And, unfortunately, there’s no way to just bring the airship up to the darn thing…
Anyhow. The net upside is that you have to catch a Black Chocobo, which will allow you to fly over, land in the forest, and then get moving. No idea how we’re getting back, but that’s how these things go. Tellah and Yang are quite confident that this cave shouldn’t pose a problem despite the fact that the other half of the party does, in fact, make use of metallic stuff. Also, there’s the fact that Tellah barely has enough MP to sustain casting for long. Also, Yang is kind of terrible. Neither of them thought this plan out at all.
Inside the Lodestone Cavern, the enemies resemble what’s been farmed half to death around Mythril, making life slightly easier and devoid of sudden difficulty curveballs, at least. Having Tellah pump out uses of the Healing Staff along with a solid physical offense takes care of most monsters with a minimum of risk. Yang picks up a pair of Faerie Claws, which can confuse the enemy; that seems to be a kind of odd reaction. “Who should I attack? Who’s my real enemy? Is it the guy who just punched me or my buddy Earl the Cave Naga? WHAT DO?!”
After a fair bit of faffing about, the team is thrown into a battle against the Dark Elf, and at this point my lips finally curled into a smile, because I’m pretty sure that this boss uses the exact same sprite as was used in Final Fantasy I‘s Anniversary remake for Astos. That’s honestly kind of clever. It’s a hopeless boss fight, though, so that means it’s best to just derp about without using resources. Everyone collapses, at which point the scene cuts to Edward lurching out of bed, declaring that everyone is in danger.
Yes, at this point we’re seriously relying on the bard to save us. And it works, too – the whisperweed transmits his song, breaking the elf’s concentration and bringing down the magnetic field that prevented us from using metallic equipment. That means it’s time for a rematch, this time with the team at full strength.
The elf is weak enough now that only a bit of pounding forces him to assume the form of the Dark Dragon, which actually looks kind of cute here. Fortunately, he’s a pushover if you have a Holy-elemental weapon and some extra levels here; Cecil took him down with nothing more than a couple of attacks. Cecil thanks Edward, steps forward, and grabs the Earth Crystal, at which point you can either fight out with your real gear or just teleport. Being quite overleveled compared to where the party should be at this point, I opted to teleport.
Back at Troia Castle, Edward and Tellah share a moment, with Tellah forgiving Edward for what happened and promising to take out Golbez himself. Kain then speaks to Cecil directly, commanding him to bring the crystal via airship and that it’s the only way to save Rosa. The leaders of Troia agree to this for reasons I can’t fathom (maybe they just really like having the world destroyed, I don’t know), and after a few more reward items and a bit more prep it’s into the Enterprise and off to the Tower of Zot.
You don’t actually get control over your flight until you arrive, which means you’re pretty much locked into this dungeon until you clear it. Once you arrive, to the surprise of no one, Golbez threatens Rosa and all but taunts Cecil to reach the top of the tower. It’s remarkably high-tech, a hint that there’s more going on here than has been immediately obvious; it’s also full of enemies that will beat on you pretty readily, but not to the point of imminent danger. What it mostly comes down to is the usual dose of resource management, sapping away at your ability to keep responding to threats. When you finally reach the save point, it’s a relief.
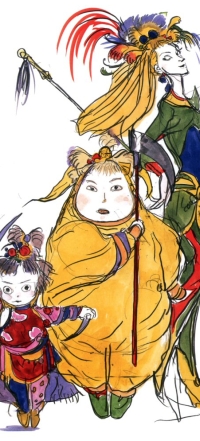
Almost immediately thereafter, you’re welcomed by a trio of women – a tall one, a stout one, and a cherubic one. They’re the Magus Sisters, servants of Barbariccia, the Lord of Wind. You know that means a boss fight is coming, and, well, here we go into battle again. It’s a race against time, essentially; Tellah can cast down Mindy quickly and a concentrated assault from the rest of the party can take out Cindy in short order, so as long as you demolish those two first and fast you’ve cleared away your biggest threat. If you’re lucky, Sandy will even Berserk your attackers and make your life easier.
I really wish the game would stop introducing characters four seconds before we have to kill them, though.
It’s wise to stop back by the save point here before heading through the penultimate door, just to be on the safe side. Kain and Golbez are waiting for you, naturally, and Cecil is still ready to hand the crystal over to Golbez, despite the fact that not five seconds ago Golbez was ready to kill Cecil just to get that crystal. There is literally no reason to believe that he’s on the level at this point. But Cecil hands it over just the same, and lo and behold, Golbez quickly backs out of his part of the deal. Shock. Horror.
Tellah is having none of this crap, however, and he charges forward to take on Golbez himself. As he unleashes the best magic he’s got, Golbez is entirely unmoved, mocking Tellah for his weakness. Enraged, Tellah casts Meteor over the objections of the party, badly hurting his nemesis… and killing himself in the process. Reeling, Golbez calls for Kain, but the sheer power of Meteor has shattered his hold on the dragoon. Golbez makes a break for it, Cecil chases him, and he flings Cecil across the room only to stop for some unexplained reason. Tellah apologizes for letting hate consume him as he finally dies.
Kain’s still there, though, and back in control of himself. The group rushes into the next room to save Rosa, pulling her free just in the nick of time. Kain reveals that while Golbez manipulated him, he did genuinely want Rosa for himself, which seems like a perfectly legitimate reason to try and destroy the world. Before the group can spend too much time on this, however, Cid wisely points out that now would be a good time to leave before something else happens.
Then something else happens.
Remember how the Magus Sisters served Barbariccia? Yep, it’s time for another boss fight. Barbariccia is the first human-looking Fiend, so of course she looks like a woman in a skimpy bikini. She’s also pretty easy; she’ll occasionally wrap herself in wind that only Kain can break through with Jump, but steady attacks will wear her down with only a few cures to your party.
As all of the archfiends have done thus far, Barbariccia isn’t done once she dies, and the tower begins collapsing. Rosa casts Teleport to bring the group back to Baron Castle at Cecil’s room, at which point Kain reveals that there’s more to Golbez’s plan than the group knows. He doesn’t actually have all of the crystals yet; the Dark Crystals remain, which are the counterpart to the Light Crystals that Golbez has been collecting thus far. Macguffin hunt part two, go!

