The Final Fantasy Project: Final Fantasy IV, part 10
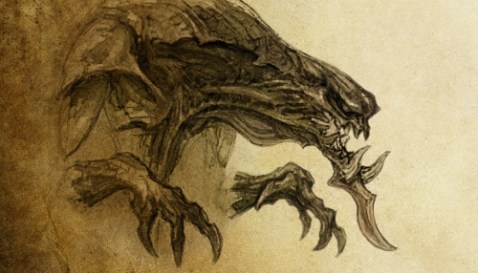
Artwork from a sketch by Yoshitaka Amano
After a brief stop at the Dwarven Castle to drop things off with the fattest possible chocobo, it’s time to head to the Feymarch! To do that, I’m sure we’ll have to penetrate a cunning illusion that hides this mystical land, surely secreted away from mortal voyagers, kept behind a veil of – oh, we just fly due west for a couple of minutes and then land on an island.
I suppose this at least answers the question of how Rydia got underground to save the party before, although how she crossed all of that lava is a different question. Maybe she’s a really good jumper.
The Passage of the Eidolons looks a lot like the Sylph Cave but with its colors swapped; to its credit, that actually feels very different and ominous. Lots of hard-hitting enemies in here, but that’s to be expected, since we’re not supposed to actually be here until later in the game. (Probably. Sidequests, you know how they go.) At least we no longer have to deal with Malboros and constant Sleep effects, although the Confusion that can be tossed around is pretty annoying.

“Sorry if my home is a little hard to get to, Cecil, but seeing as some jackass blew up my original home along with everyone I ever loved, it seemed like a good idea not to include a Welcome mat.”
The actual flow of this dungeon is fairly similar to the Sylph Cave, insofar as you keep Float on, laugh at the enemies who love using Earthquake against a floating party, and get annoyed by the fact that the game loves skipping turns for people whose ATB bars filled just as several monsters get their turn in a row. There’s only one monster-in-a-box treasure in here, the Defender for Cecil, and the pillaging of various chests is easily handled as we make our way to the teleporter at the bottom of the dungeon.
Stepping on the teleporter drops the group off unceremoniously on the upper level of the Feymarch, surrounded by ominous cloaked figures that are actually quite pleasant. There are some new arrows to pick up for Rosa’s bow, a new shield for Cecil, and some nice new armor for Rosa and Rydia. Also, the optional fights for more summons that you knew were coming because of course they were. Starting with a fight against Queen Asura, who manages to make for a fairly straightforward fight once she’s got Reflect on her to bounce her self-heals off. She still likes to counter-hit people a lot, so people will drop regularly, but it’s something you can handle. Once Asura is down and in your summon folder, you can face Leviathan, who is actually a lot easier than his wife was; his big attack just hits for moderate damage, so you can mostly just hammer him with spells and attacks whilst curing religiously.
We also pick up a rat tail, because as everyone knows, this is a series in which those are super important.
The Feymarch wraps up the faffing about that the party could do before returning to the main quest, so after a quick recharge and restock, it’s back to the main quest to stop what’s-his-name. Gomez? That sounds right. Off to the Sealed Cave!
Once in the Sealed Cave, the door requires Luca’s Pendant to open up, followed by a quick introduction to the dungeon’s signature thing, the Trap Door. It’s a door which is a monster. Yes, a literal trap door. I kind of love this. The doors will attack someone with an instant-kill and then summon a monster, but if you’re quick you can kill them before that happens. Slapping an auto-berserk weapon on Kain and letting him go to down took care of them before their death spell even went off.
They’re also about the only enemy left in the dungeon that actually posed some sort of challenge; most of the monsters along the way were pushovers, since the team was a bit beyond their expected development by this point. It’s fairly smooth sailing until the team reaches the crystal chamber, walks up to the crystal, and… and takes it. Like, that just works. They nab it, and everything’s cool. Holy crap. It actually worked.
Hello, Wallace. You were a fun fight when people didn’t keep slipping off the edges like a bunch of losers for no good reason.
Of course, as soon as the group leaves, the walls come to life and come after the party, because nothing can be easy. Yes, it’s a fight with a Demon Wall, or as I’ve affectionately nicknamed him in Final Fantasy XIV, Wallace. Like always, this is a pure race against time to kill the boss before you get squished. At the levels we’re at, it’s not much of a fight, and he didn’t make it far before being killed. So we warp back to the entrance, get ready to walk out, and then something really goes wrong.
Golbez takes control of Kain again. Because he could have… just done that at any time, apparently? Who knows. Once again, the game pulls the football away at the last minute, because screw you, player. I can’t wait until Kain gets redeemed again, because this hasn’t become tedious or pointless or anything.
Seriously, this game’s entire plot is basically about screwing you over in ways you had no ability to plan for. You just arbitrarily get thrown around, and then you’re supposed to feel bad about it, when it’s really just clumsy writing and plotline fiat. Sure, I get that we can’t just stop Golbez ten minutes in, but the game routinely prevents you from feeling as if you’ve accomplished anything by yanking every would-be victory away within seconds, sometimes even after the group has logically succeeded.
Worse yet, they just feel like cheating. If Golbez could take control of Kain at any time, why would he wait until now? Or is Kain actually working with Golbez now, equally arbitrarily? Meh.
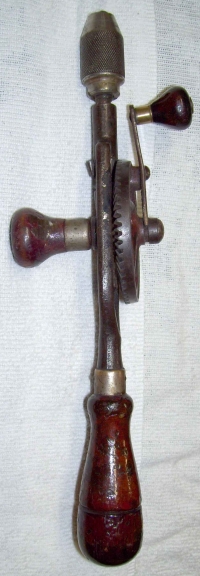
Just slap one of these babies on the front of your car and you can pass right through cement! Drills!
At any rate, the group once again wholly failed to do its one job, so King Giott back in Dwarven Castle promptly tells his guards to throw the party in the dungeon. Ha! Of course not; he tells them about the legend of the Lunar Whale and gives them cupcakes. (Well, the cupcakes are implied.) Cecil realizes that the party needs to get to Mysidia, at which point Cid shows up again to attach a drill to the Falcon, thus allowing the party to dig back to the overworld. In an airship. With a drill. He also collapses again afterward, thus explaining why he doesn’t fill out your party again.
Now that we can get back to the surface, some more sidequesting can be done, which involves a fair bit of swapping airships left and right. Yay. The Enterprise and the hovercraft are right where we left them, and we can use them to get to the Adamantite ore in exchange for the rat tail. You may also remember that there was a dwarf looking for precisely that ore, which sounds like everything’s coming together. Rather than heading straight to the Underworld, though, we take a quick detour to Fabul, where Yang’s wife resides. She asks you to hit him in the head with a frying pan.
Are we totally sure she wants him back unharmed? He may just have really good life insurance.
At Kokkol’s Forge, the dwarven smith takes the Adamantite and the Mythgraven Blade, promising to make something new out of the old weapon. A quick trip through the Sylph cave allows us to wake up Yang again, which gives Rydia the Sylph summon and gets the group a Kitchen Knife from his wife (which serves as a potent throwing weapon).
Having taken down Leviathan and Asura, a path is open in Baron Castle. Reaching the bottom reveals that the original king of Baron – the one who made Cecil into a Dark Knight – is waiting beneath the castle, which leads into a kind of nifty boss fight against Odin. Your party has a very short time limit to kill Odin, who uses nothing other than weak physical attacks and Zanketsuken, so you have to really pour on the damage. Victory unlocks the guy himself, which is pretty neat.
Once all that is done, it’s back to Mysidia after all. The town elder immediately grabs you as soon as you walk into the town, recapping the prophecy from Cecil’s sword before joining in a prayer to try and summon the Lunar Whale. Apparently having Cecil there succeeds in summoning the thing, which looks like nothing so much as a submarine that’s got jet engines, but let’s not point that out to the Mysidians when they’re so proud. Inside the Whale is a crystal that allows it to fly to the moon itself, which makes sense since it apparently came from the moon in the first place.
So off we go to the moon! And then back to talk to Kokkol and get the Excalibur really quickly, and then back to the moon. We’ll just pretend we only went the once.
 Recent Work
- An error has occurred; the feed is probably down. Try again later.
Chocobo Dash
- An error has occurred; the feed is probably down. Try again later.
