The Final Fantasy Project: Final Fantasy IV, part 12

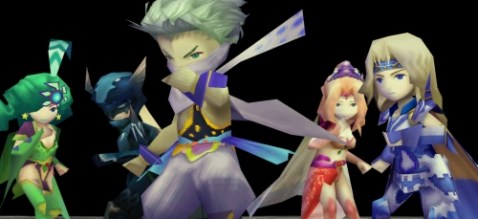
Artwork from a sketch by Yoshitaka Amano
The game doesn’t really tell you where your destination will be for the final confrontation, but it seems pretty obvious from the sheer sparsity of options about where to go on the moon’s surface. A quick trip to the Crystal Palace allows the party to walk into the back and access the space beneath the moon’s surface, complete with the power of the crystals guiding everyone or whatever. One suspects that the game was getting a bit bloated by this point.
The Lunar Subterrane is big and sprawling, but not quite so much as the last boss rush in Final Fantasy III; you can actually exit, for one thing, which right away makes the experience very different and gives you more reliable control over the encounters you’re facing. More to the point, you can save before the final boss rather than simply praying for rain. It’s not the apex of the sprawling final dungeons that would become a regular series thing later in the franchise, but this one is big and meant to be tackled in stages.
The enemies in here don’t start off too different from what you fought in the Giant, but generally in greater numbers. It adds a bunch of teleporters to its navigational hazards, which combine nicely with the existing opacity of hidden walls to make getting from place to place a bit of a nightmare. And, while we’re on the subject of Final Fantasy III comparisons, it also features a variety of floating weapons that are significant upgrades but require a boss fight to obtain them, starting with the White Dragon. He absorbs every element, counters physical attacks with Slow, casts that goddamn Maelstrom spell, and responds to summon spells by using Earthquake.
It sounds pretty bad until you realize that you can just cast Float, have Rydia chain-summon Bahamut, and laugh all the way to the bank. One dragon down, one new sword for Edge.

This is not the Lunar Subterrane, but boy, it would be nice to have more of a change of scenery.
Venturing further into the dungeon uncovers several sets of armor for the characters – Dragon Mail for Kain, Crystal Mail for Cecil, and so forth. The fights also start to get just a bit harder and longer as the floors wear on, with enemy groups getting bigger and attacks becoming a bit more vicious. This is not helped at all by the blandness of the visuals, since the dungeon itself is black, blue, and gray all the way through.
A few floors down, you also encounter Ahrimans, which are ridiculous in this game. Their one real attack is Doom, which is fine, but Doom works like a buff in this game. Which means that if the Ahriman attacks someone with Doom whose counter was nearly done, it resets back to ten, meaning that it actually helped you. Individually, they’re not bad to fight; in pairs they’re pretty brutal, since those Dooms start to add up.
By the time you hit the first save point, you’ll feel like you’ve really earned a brief respite, but waiting pretty much right outside of the door is another sword and another boss fight against Dark Bahamut. This is a brutal fight, but an oddly satisfying one, as his attacks are pretty much limited to casting Reflect and bouncing Flares at the party. I also fought him at a slightly lower level than recommended, but that just made everything feel more intense; unless you’ve leveled insanely high by this point, two of his Flares will drop a party member, so you have to balance your attack instincts with keeping the team going.
Finishing him off nets Cecil the Ragnarok and gives the general feeling of a job well done. As bland as this final dungeon feels, it does give the sense of accomplishment as you can get further and further in, tearing through more and more enemies with less and less effort.
After quite a bit of backtracking from that sword, the group finds another save point and can take on the dreaded Plague Horror, as this dungeon’s designers have gotten the idea that no one likes to have a save point halfway through the dungeon rather than right before the boss. This guy is basically a souped-up Ahriman, which means its a race against time to beat the Doom status; fortunately, that’s not terribly difficult even with him casting Haste on the group. Not far beyond that are a pair of Lunasaurs that take the group on in a double battle, but they’re pretty easy to overcome so long as the group took the minimal amount of time necessary to stop back at the prior save point.

That point when you’re having more fun with the game when you completely ignore who the characters are and focus on who you want them to be.
Because of the structure of the dungeon, this is actually not a bad point to warp outside, spend some gil on Elixirs, and then come back in. Considering there are a bunch of useless weapons and armor pieces currently sitting in our collective inventory, it makes sense. Not that getting back down to the save point doesn’t suck, but it’s doable without too much frustration.
Moving on from the last save point, the dungeon architecture changes, the music shifts, and the regular enemy fights are done with; all that the group will face from here on out are boss fights. One last weapon-based boss gives Edge his best weapon in the game in the form of the Masamune, but even the random encounters are replaced with straight boss fights now. This is irritating, and it’s largely advisable to just run from these battles, especially once you realize what’s down on the eleventh floor.
Down there, there are just two enemies that spawn. One of them can only be hurt with magic, but the other – Zemus’s Breath – does nothing but Libra your party over and over so long as you just physically smack him. It’s the ideal place to farm experience, since you can easily earn a big chunk of gil and experience just by turning on your auto-battle and letting everyone smack him. A good way to ensure that the party is caught up for the final battle; the only downside is that it’s past the point of no return, so you can’t port out and save all of your level grinding. All the more reason to work your way to ludicrous levels, then.
For the record, I just idly kept at this over a morning of work until Rydia, who levels slower than everyone else, had hit level 61. I could have kept going, but that seemed like a fair stopping point.
Once the grinding is done and the group moves on to the very last zone, Fusoya and Golbez have already engaged Zemus and are unloading everything they’ve got. They cast Meteor on Zemus, who puts up no resistance. His body collapses, but it should serve as no surprise whatsoever when the would-be dead Zemus reforms into Zeromus, a spirit form of pure loathing. This time the characters not in the party completely fail to even inconvenience him, because we couldn’t have just started there.
Golbez tries to use a crystal to weaken Zeromus, but the fact that he chose and embraced darkness prevents it from working. This is followed by a “we’re all praying for you” scene that’s directly reminiscent of FFIII‘s conclusion, but done far more dramatically – the group shows up on the boundary of death, with Cecil down to one hit point and everyone else on the ground, with the still-living former party members praying revitalizing the group and giving Cecil the crystal. Using the crystal turns him into a form that the group can properly face, launching the final fight.
Like several of the enemies in this particular game, Zeromus counterattacks many things with severe brutality, which means that the safe way to play this one is fairly slow. Asura summons, Curaja spam, and the three front-line characters attack (or, in Edge’s case, throw). It’s remarkably lackluster; your big risk just comes down to getting bad luck on Asura and having Zeromus hit you too hard to recover from. I actually took him out without even breaking into my Elixir stock.
Zeromus claims he can never truly be destroyed so long as evil remains, but Fusoya counters that evil will always exist and will always be counterbalanced by good. Lights flash, the villain explodes, the standard.
Fusoya goes to return to sleep with the other Lunarians, and Golbez asks to join him. Cecil goes through a bit of soulsearching and offers Golbez something resembling a goodbye, which doesn’t exactly justify that eleventh-hour plot twist but at least brings it to something of a resolution. The Mysidian prophecy is restated as the group returns to the planet, leaving the Lunar Whale beneath the ocean once again.
The ending then moves on to epilogues for all of the characters – Palom and Porom are still training to be sages, Edge is arguing with royal advisors and pining after Rydia, Rydia is back in the Feymarch. Yang gets promoted to king of Fabul, Edward rebuilds Damcyan, and so forth. Everyone obliquely refers to Cecil along the way, but naturally he’s the last one to actually be shown off; first we have to see the dwarves dismantle their army and announce that Rosa and Cecil are becoming king and queen of Baron. Oh, and Kain has to stare off into the distance mournfully, intending to climb Mount Ordeals just like Cecil did. Then it’s time for the wedding, the cast roll, the usual Final Fantasy fanfare, and roll credits… with me still unclear as to how this game managed to spawn a set of sequels.

Today I learned that it’s okay to blow up a village if you apologize for it later and you still get to be the hero.
Oh, and if you want to, you can also save the game and go through some post-game content, with more stuff opening as you beat the final boss with a wider variety of party members. I don’t think I’m going to be worrying about that, no.
Final Fantasy IV invites some comparisons to Final Fantasy II insofar as both of them were incredibly ambitious for their time, and Final Fantasy IV stands up far better from a technical standpoint. Unfortunately, while the actual mechanical game is better, the plot isn’t. While there are some really nice scenes in Final Fantasy IV, they’re undercut by the fact that the game fundamentally doesn’t have much of a plot beyond “retell this same redemption story several dozen times, no matter how little sense it makes.” The characters aren’t much more than thin stereotypes, sacrifices are made that don’t make much sense and then wind up being undone soon thereafter anyhow… it’s kind of silly.
What really wears it down, though, is the simple fact that everything being done here would be done again elsewhere, only better. It feels like the poor cousin of the series simply because its innovations were baked in to better titles along the way. More so than anything in the first generation, Final Fantasy IV is a game that gets wholly lost under its later sequels, because it’s doing nothing that the next several installments don’t do as well or better.
Which makes the fact that I’m not actually done with its continuity yet even more baffling. Seriously, there’s a bunch more after this. But that’s a topic for next week.
