The Final Fantasy Project: Final Fantasy IV: The After Years, part 3
Artwork from a sketch by Yoshitaka Amano
Once you’ve cleared the first of the tales, the game opens up a bit – there are six more tales available right away, each covering a different character who ties back into Final Fantasy IV. Curiously, Ceodore is the only new party member to get billed as having his own tale, as all of the others feature characters from the first game, although Rydia, Palom, and Porom have all grown up quite a bit since their initial appearances.
And yes, there are more than seven altogether, but the point is that these events happen in a similar timeframe and don’t overlap with other characters in the same way that Ceodore’s tale does. But let’s put that to one side for a moment; we’re still going to take these on in the order they’re presented and the order of their release. I did think it was neat that the option for skipping between them existed, though, especially knowing that more unlock as you continue.
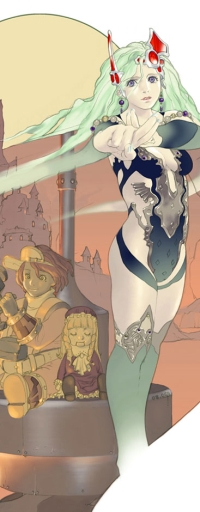
I don’t even know where to start with your outfit and what’s going on here.
So who’s next on the list? Everyone’s favorite repeatedly screwed-over summoner in Rydia’s Tale – The Eidolons Shackled.
The tale opens off with some flashbacks to Ceodore’s birth and the various nations helping to rebuild Mist, first and foremost… er… Edward. Look, I don’t want to tell Cecil what his job is as the king of the castle not more than a ten-minute walk south of Mist, but considering he blew up the town and killed Rydia’s mother you would think it could have a higher priority on his list. Once the flashbacks are over, though, we get back to current adult Rydia visiting the Feymarch to frosty reception from Asura and Leviathan… followed by the arrival of Not-Rydia once again.
Yes, we saw this during Ceodore’s story, I know.
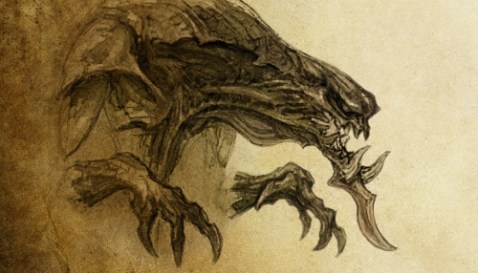
Rydia comes to after being sent away by the Eidolon King only to find everyone turned to stone and barely responsive; seeing the king and queen again flashes her back to the destruction of Mist in the first game. She enters the passage back to the Underworld, attempts to summon an Eidolon to tear through some monsters, and quickly finds her summons non-functional. She makes it out of the passage, but then she’s ambushed by a Zu and happily proclaims she’s helpless.
Fortunately for any uncomfortable readings of this particular incident, Rydia is rescued by Luca, the dwarven girl from the first game who is now the resident dwarven engineer. I adore Luca. She’s painfully cute and smart besides, she is utterly awesome. Apparently she was taking the Falcon on patrol to test some engine improvements and to generally check out the increase in the monsters all over the place.
Unexpectedly, the dwarven castle comes under attack from what appears to be a Red Wings airship, so we’re starting this up again.
Arriving back at the castle, King Giott claims that the castle is mostly okay, but a woman burst in using Eidolons and stole the Crystal. Yep. Luca declares that she’ll go with Rydia to secure the last Dark Crystal in the Sealed Cave, because that worked so well the last time someone had that plan, but what does it matter? You knew this was going to end up there. She also activates Calca and Brina, who are now helping the group rather than fighting against us as they did in the first game, so yay. Unfortunately, they’re pretty awful.
After a bit of grinding and acquiring weaponry, it’s time to head into… the Sylph Cave. Yes, not the Sealed Cave yet; the other one is there, it has stuff, and it gives us a chance to get accustomed to this party’s tricks. Brina is the closest the group has to a white mage, since her Dances provide healing and buffs; Calca is basically a worse version of Luca, while Rydia is taking over the role of black mage without her spells. At the bottom of the Sylph Cave it turns out that the Sylphs have been petrified as well, with no sign of the imposter responsible.
I show up in the challenge dungeon like a million times! It’s all Wallace from here on out, bitches.
Moving on to the Sealed Cave like we were supposed to do in the first place… well, I’ve written about this place twice before. There are fewer Trap Doors than usual here, which is nice. But we have to deal with Brina’s unreliable healing, which is awful. If I need to tell you who the final boss her is, I’ll be very disappointed, so let’s just assume you can figure it out. (Hint: same as the last two times.)
Unsurprisingly, the group loses the Crystal to the Mysterious Girl at the entrance, because absolutely no trip to the Sealed Cave ever works. She also fries the heck out of Calca and Brina, which feels less like a tragedy and more like the loss of the live bodies to draw attacks by 50%. The girls head to Baron to try and figure out what’s going on, but Calca and Brina get up and attack the pair. That’s followed by the ship getting shot at by Red Wings airships, wrecking another airship. It’s like Final Fantasy III all over again.
Once the pair is down on the ground, Luca mourns the loss of her robot dolls for a moment, then Rydia encourages her to keep moving. Seeing as the Falcon crashed near Agart, i.e. not far from where it emerged in the first place, the duo heads into the Agart Mines. This portion… kind of blows. You have no healer nor anything that can pass for one other than Rydia throwing items around, and the duo cannot reliably wipe out lots of things as fast as Ceodore and Vincent Adultman. It feels much more fragile, let’s leave it at that.
Interestingly enough, there’s a bit of a sidequest; getting into a room within the mines during the right phase of the moon allows you to fight Quarto Dolls, who drop two items vital for a story branch later on. It’s one of those things you’re unlikely to stumble upon, sadly.
The final boss is an interesting case, as it’s a dance of hitting him with periodic ice spells to prevent him from charging up his big attack. Honestly, as long as you get the timing down it’s pretty easy, but it’s something novel in a boss, at least. On the walk back out, there’s a pot that refreshes HP/MP, which makes for a prime grinding spot before the challenge dungeon, especially once I set Rydia up to cast flaming death on her enemies over and over. This isn’t strictly necessary, but getting Rydia access to Bio makes life much easier.

Pimp my sky-ride.
After getting out, Rydia and Luca set to fixing the Falcon. If you didn’t farm a few items from the dungeon, Luca will have to salvage Calca and Brina for parts to finish the repairs; otherwise, she’ll finish repairing the ship and she’ll bring the dolls back online as well. The victory is short-lived, however – once the Falcon is fixed, Titan appears, heading toward Agart with murder on his mind. The girls do their best to stop him, but when they finally get his attention he nearly destroys them both until a mysterious man dressed in black shows up.
The Man in Black announces that they need to head for the Tower of Babil, and Rydia demands to know who this guy is. And… that’s it. Not much of a conclusion.
Rydia’s Challenge Dungeon throws her back to the Sealed Cave with harder enemies and a few layout changes, and boy am I ever tired of this place now. This is, however, an interesting dungeon insofar as the best way to get through it is to basically have Rydia spam her Bio as fast as possible, which can kill most anything shy of Mad Ogres and Demon Walls in one shot on the Full Moon. Once you know the path, it’s another dungeon that can be blown through quickly to farm the random chest at the end, since you just stick the girls on auto-battle and spam Bio that way.
It also has a pathetically easy final boss, who goes down in literally two casts of Bio.
On the one hand, this tale featured Luca, who is absolutely wonderful. On the other hand, it felt a fair bit more scattershot, and it very much followed the same formula as its predecessor, even re-using several of the same enemies in the last few dungeons. It also had the downside that Rydia and Luca wind up not complementing one another as nicely as perhaps the designers though. Still, it was fun enough, and there was never a point when I wanted to throw the dang thing away. It’s still proving more entertaining than its antecedent, oddly, although if I never see the Sealed Cave again I’ll be happy.
 Recent Work
- An error has occurred; the feed is probably down. Try again later.
Chocobo Dash
- An error has occurred; the feed is probably down. Try again later.
